Smart Lighting and Wall Washing
The systems Smart Lighting are lighting control systems Smart that, with the use of one or more central processing devices, provide the right amount of light, where and when needed. Lighting control systems are employed to maximize energy savings and to control the color of the lighting with Wall Washing.
With the system Theremino an installer can create high-end systems, fully programmable, to tune the walls with the colors of the sky, the temperature, the sounds, Il mattino, at night and the seasons.
You might think that keeping a computer turned on will lead to an increase in consumption, but the opposite is true. The savings you get by using LEDs and modulating the light is much greater than the consumption of a eeeBox (about 11 Watts) or other PC without HardDisk which consume even less.
Also featuring a programmable lighting you can always add new features, for example follow the movement of people, soften the lighting when all emerge from a room, turn off the lights and also take account of sunlight.
We talk about home automation?
No it's not about home automation, that we let her do a B-Ticino who studied a system more comfortable with power and signals on two wires only (and you can also swap the wires with each other)
Line B-Ticino is slower than that of the system Theremino, less suitable for sensors and process control, but better suited to living with 220 electrical installations and lightning.
We recommend therefore to manage with B-Ticino the portion of the House typically home automation (heating, switches, anti-theft sensors and the like) and to communicate the system Theremino and B-Ticino via software (the same PC runs both systems and also B-Ticino usa VbNet) We are preparing applications that will act as a bridge between the two systems.
Prehistory of computerized lighting
Theremino the system collects over thirty years experience on computerized systems lighting control and input-output for PC. Here you can read a chronological list of past projects: contacts/the-theremino-history
Various types of lighting fixtures
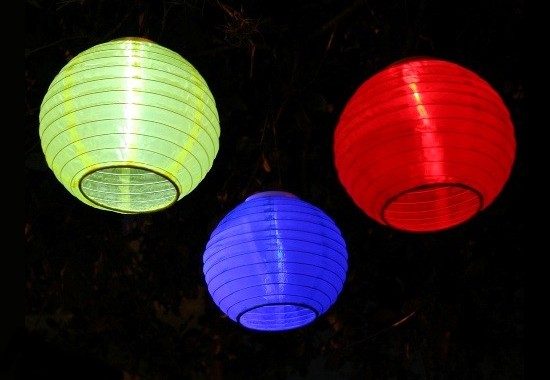
The classic Chinese chandeliers are great speakers for led light but you could also use old oil or gas lamps, or diffused light ceiling lights that were fitted with incandescent bulbs. The best materials to diffuse light Opal opal glass and plastics are.
The led strips are easier to use because it diffuses light onto a long surface, just place them so that the individual LEDs are not directly visible as explained in the next chapters.
Once installed the system, whatever its configuration, You can use for many interesting applications:
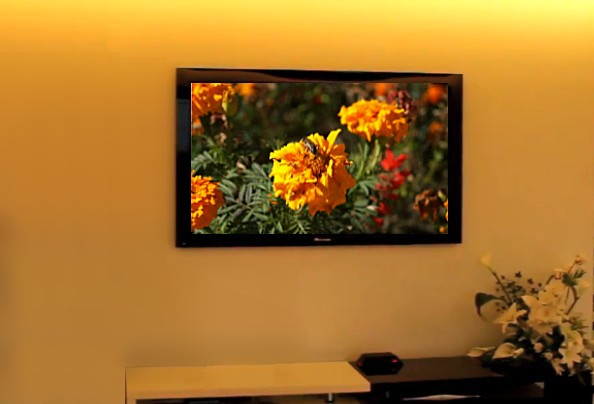
1) "Wall Washer" that adjusts the color depending on the time of day and the color of the sky. With Theremino Script you can program these variations taking into account all variables and timings would.
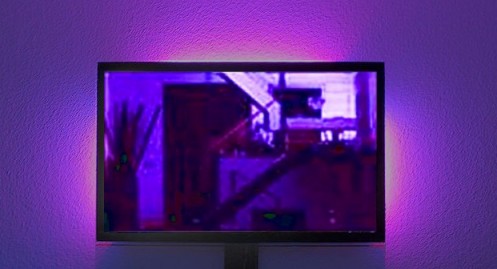
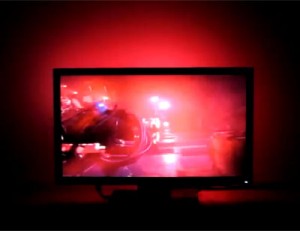
2) Back lighting "effect that tinged the wall behind the monitor or tv with the average color of the video you are watching. This reduces eyestrain because more light is shaking pupils and put better focus the video image.
3) Automatic colour changer dyeing room of light colors, that fade slowly, with a very relaxing effect. The colors can be controlled with ThereminoRGB or with a few lines of Theremino Script.
4) Lighting “psychedelic” that follows the pattern of music with color. Even the stroboscopic effect is possible because LEDs have a very fast response.
An example of TV BackLighting
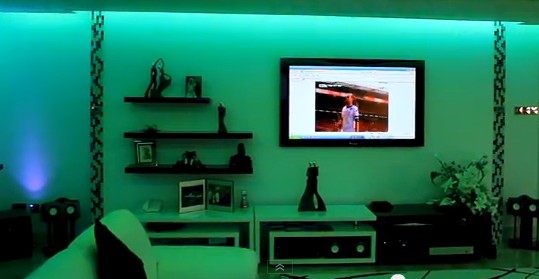
An example of Wall Washing.
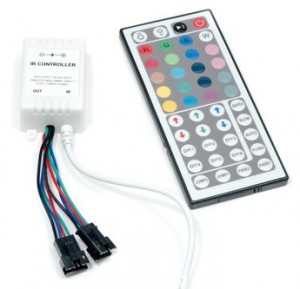
The systems currently on the market, for how expensive, change colors randomly or manually, with a remote control, as shown in this example.
But only with the system Theremino an installer can create high-end systems, fully programmable, to tune the walls with the colors of the sky, the temperature, the sounds, Il mattino, at night and the seasons.
A psychedelic ball – the PsycoBall
In these pictures and this YouTube video you see the brightness of a PsycoBall in 32 comparative led with monitors and ambient light. Watching the video it should be taken into account that the WebCam saturated colors and is slow (a few frames per second).
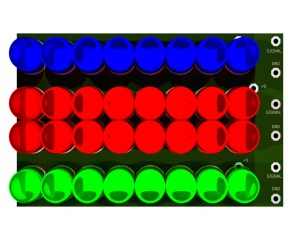
The PsycoBall can be a great USB gadgets as gifts to the girl or to be used for "fine dining", a Master, three transistors, some LEDs and a ball of recovery, for a total of about 25 Euro.
You can weld led, resistors and transistors on a piece of veroboard. Attention to buy ultra bright LEDs that are really, If you are from about 130 degrees must be at least 1000 MCD, If they are from about 20 degrees must be at least 10000 MCD.
For a PsycoBall led should be used 130 degrees in order to get a good color mixing. With led 20 degrees in addition to using a ball of Opal good material you should also add a diffuser screen inside.
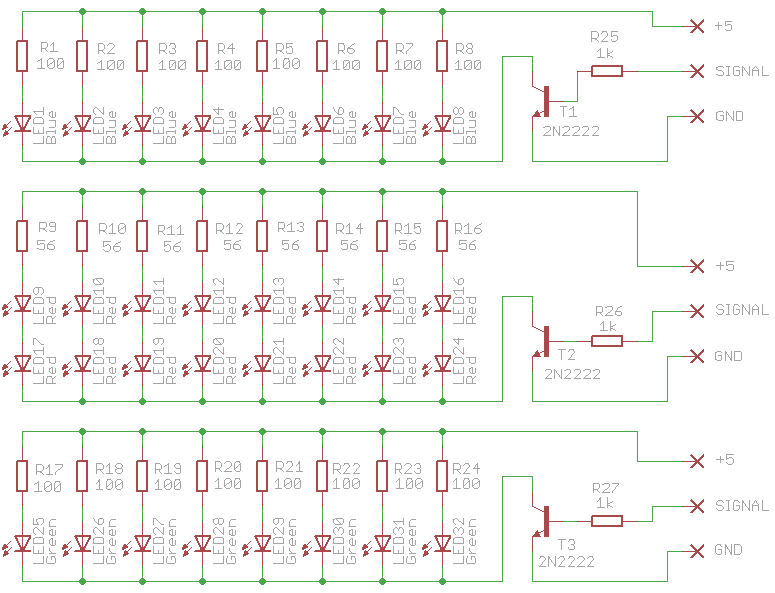
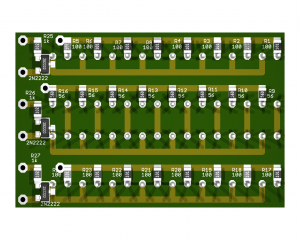
Each led must have a resistor in series (to adjust depending on the color of the LEDs to give it 20 mA) You should not use a single resistor for everybody because the LEDs are not equal to each other (We have verified that, with a common resistor, some LEDs can receive a current twice than others and thus could burn in a short time)
Care to choose well the resistors for each color so that each led does not exceed 20 mA. With 20 but LEDs last practically forever (about 50000 hours, more than 5 years stuck on at maximum light) But already with only 25 but halved their lives. You should never exceed 25 But even for short periods. You can find exact value resistors but seek the closest to stay between resistors 18 to 22 mA.
Typically the Red LEDs are 2 Volts, the Greens from 3 Volts and blues from 3.2 Volts then the resistors should be from:
Red: about 56 ohm resistor (5 Volts – 2 Volts = 1 Volts / 56 ohm = 18 mA) (or 47 ohm = 21 mA)
Green: about 100 ohm resistor (5 Volts – 3 Volts = 2 Volts / 100 ohm = 20 mA)
Blue: about 100 ohm resistor (5 Volts – 3.2 Volts = 1.8 Volts / 100 ohm = 18 mA)
The Red LEDs are less efficient but you can put two in series because they require only 2 Volts (compared with about 3 Volts of Greens and blue). Using the Red LEDs in twos can be connected 16 LEDs in place of 8 and get dual light with the same current. And this is really helpful to compensate for the lower efficiency of Red LEDs.
The total current is around 450 mA, of less than 500 but a maximum of a single USB plug.
The components are willing to step 2.54 mm so you can easily use a piece of veroboard from 18 for 11 holes. This file PsycoBall_EagleProject contains pictures and the complete project, Eagle.
It is not really necessary to use the maximum of the LEDs and maximum current. If you are using 32 you get very good quality led brightness, definitely capable of "psichedelizzare" a medium sized room.
Mind you though, We talk about work in Twilight, like when you watch a movie. If you want systems that can color the walls even in the daytime you should use high power LEDs as shown here: hardware/outputs/led-drivers or led strips as indicated in the following paragraphs of this same page.
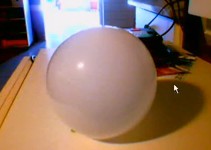
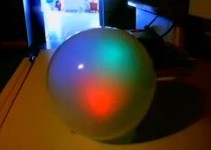
An example of PsycoBall with only three led
The ball of this video isn't very bright, only contains three LEDs, driven directly from the signals to 3.3 Volts of pin. A real PsycoBall should contain 32 bright LEDs, driven with much greater current from USB 5 volt.
Led lighting strips
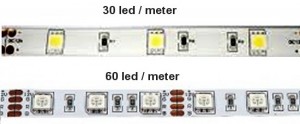
The LEDs are becoming efficient enough to do real competition to all other lighting techniques. High power LEDs wastes a lot of energy into heat and are awkward to use because you need an aluminum heat sink. Instead the strips from 30 or 60 LEDs per meter are invading the field of home lighting with their advantages, widespread light damage, do not heat, they are easy to glue along the ceiling and can be adjusted in brightness and color.
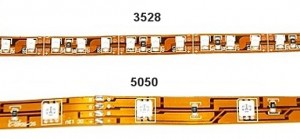
- With led 3528 or with led 5050 – Led strips 3528 are to be discarded, the new LEDs 5050 give three times more light without costing three times. Make sure they are right their.
- From 30 or from 60 LEDs per meter – Those from 60 LEDs per meter are to choose from to make dual light with the same length.
- Waterproof or not – Those raincoats are covered with translucent silicone rubber. For use at home are better than normal, cost less.
Colors of stripes:
- RGB – Can be adjusted to obtain all colors but are less efficient than white stripes.
- Warm white – The best to use in normal cases, When you do not want to adjust the color but only the brightness. Do the RGB Strip light more, about twice.
- Cool white – Make slightly more warm white light but blue light is quite unnatural for those accustomed to standard incandescent lamps. Perhaps accustomed might fit.
- Single color (Red, Green, Blue, Yellow, Orange, Viola) – To be used only in special cases but unfit for normal lighting housewife.
Place the strips
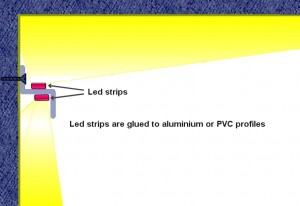
In a normal room, not equipped with slots in drywall or stucco, You can apply a “L” aluminum or plastic along the edge of the wall, at 10 cm from the ceiling and put the strips above, wishing you toward the ceiling. Alternatively you can set “L” on the ceiling and turn the strips to the walls, or use a “S” and illuminate both the ceiling and the walls. In all cases both the ceiling that the walls must be strictly white. The color, If necessary, give him the LEDs.
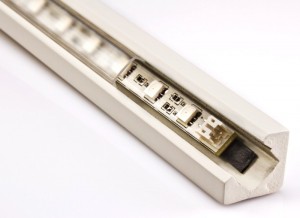
There are many profiles for led strips, aluminum or plastic, even with transparent cover dust-proof and flood but they are all very expensive, even more of the stripes themselves. Therefore, a simple profile “L” made of plastic or aluminium.
In this picture, you see two systems comparison, a simple plastic or aluminium profile, It can cost less than one Euro per meter, and a profile done on purpose for led strips, you don't get to have for less than 10 or 15 Euro per meter.
Enlarge the photo to the left to see details. Depending on whether the strips are one or two and you wish to illuminate only the ceiling, walls or both, You can use profiles of various shapes. In some cases a simple “L”. Not finding a listing in “S” You can build by gluing two “L” that are easily found both in plastic and aluminium.
In all cases, it must be ensured that no light can strike directly eyes and the wall or ceiling are illuminated well. Before mounting the all's well experiment with a section from a meter or with suitably sized cards or a scale drawing of the room.
Adapter between the Theremino and the led strips
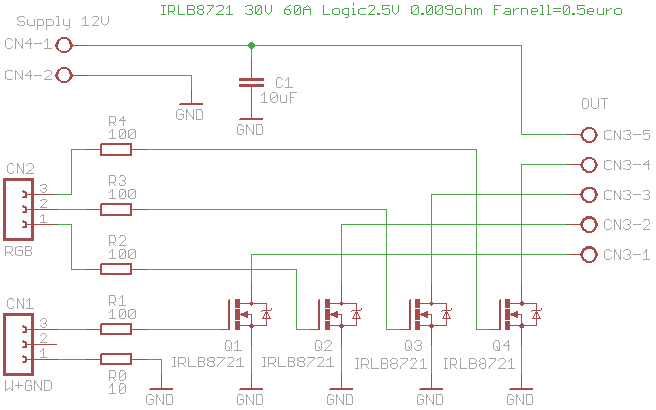
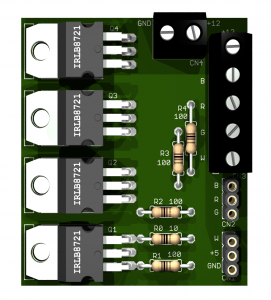
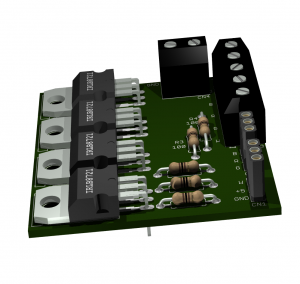
Using this adapter, you can control the three RGB colors and white at the same time, in order to provide plenty of light to the room when you need it (for example, to do the cleaning) and at the same time you can get all the colors in the evening. The maximum current for each channel is over 10 Ampere, with the mosfet without heatsink. So you don't have to worry about which and how many strips are connected, will never be too many.
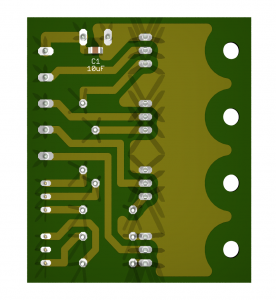
All holes are remote 2.54 mm so it is easy to build it on a Breadboard. The links are easily with the same chopped by the resistors. Those who want to make the printed circuit board can download the complete project Eagle: Adapter_DriverRGB_EagleProject
This adapter can work along with the usual controllers with IR remote control. You connect them in parallel and can be used both, at the same time, with power supply and common led strips. When watching tv or whenever you want a psychedelic environment following the music with color, you drive the system from the PC via Theremino. When you want a static lighting the infrared remote control keeps running even with PC off. The signals can arrive from both your PC and the remote control, at the same time, the two settings are combined and are limited automatically when you go to the full light. In any case they don't claim the LEDs and other components of the system.
How to illuminate the wall behind the monitor and why
When sitting on a couch in a normal living room the eye it has a field of more or less wide as the back wall, 4 meters wide and 3 tall and also a lot more if you take into account peripheral vision.
But a television, even though monstrously large, does not cover a small portion of the Visual field and, in the absence of lighting, the rest of the back wall is left completely in the dark.
Since the pupil narrows according to the average of the light, It happens that in this unnatural situation remains too open, with two consequences:
- The focus gets worse and the video image becomes slightly less sharp.
- The light from bright areas are too many and it produces fatigue or even damage to the eye, If very high brightness and contrast are held for long periods.
The solution, historically recommended up the beginnings of television is to illuminate the rear wall with a lamp. See for example the lamp “Sight-Saving Baca”
Though attention: You should not illuminate a small area around the tv and leave in the dark the rest of the field of view, This does not produce benefits, actually worsens the situation again, because the light near the image produces glare and leads to increase brightness and contrast.
And, unfortunately, It also happens that during dark scenes of dark details get lost video. The effect of dark scenes is so compromised that many prefer to stay without lamp completely.
It would take a lamp that drops alone during the dark scenes… that is precisely what we will do!
– – – – – –
Then, How to be a good back-light?
The entire back wall must be lit evenly. Light up ten centimeters around the monitor just increases glare, door to turn up the brightness and contrast and fatigues still more the view.
The brightness of the light must follow the video brightness or, better yet, also follow the average color of the video. And the brightness should vary linearly and soft without jerks and sudden glare.
– – – – – –
A beautiful solution, but to be discarded
First of all look at this video.
And’ a beautiful effect, fantastic, scenographic, awesome!!!
But we do not follow this road: Illuminate a small area around the TV produces an apparent widening of the image but does not solve the problem of backlight, actually worsens the glare, further reduces the sharpness of the image and even more tired the view.
For who wants at all costs, We advise you not to do it again with Theremino, but to buy the kit Adalight Adafruit. This kit is simple, reliable and works great (like all products by Adafruit among other things)
But don't buy the led strips Adafruit for use with USB power system Theremino. The RGB led strips Adafruit are inefficient and are only good because they are many and are powered by 220. They also have a property for the backlight does not interest us, are addressable individually, and so I am also quite expensive.
– – – – – –
The solution I recommend
Illuminate the entire field of view, so the entire rear wall or even all the walls of the room, with uniform color obtained from the average of the video signal. Use long led strips placed at the bottom or on the edge of the ceiling. Or you can use one or more chandeliers, or bright balls, to brighten any room. In all cases you must avoid that light go to hit the surface of the video or dazzle the eye with direct light. To avoid this you can use opaque or diffusing screens positioned.
During bright scenes no matter what any room is fairly lit up, This does not detract from realism to video. During dark scenes instead, the lighting must follow slowly both color and luminance of the video signal, until complete darkness, or almost.
– – – – – –
Extract the three RGB channels from the video signal
To achieve maximum quality you should read only the edge pixels of video (as do some pseudo-enlargement of the video systems) but all pixels of the video signal, that unfortunately are a thousand times more (edges = a few thousand / total = millions)
A microcontroller is unable to read the millions of pixels in a video image with the necessary speed (at least 30 times per second), It can't be done with an Arduino and even the PIC 24 System Theremino can do it.
Then, for not sacrificing smoothness of response or quality of media, You must go directly to the video card or signal coming from a WebCam and software have to reside on the PC, use DirectX or DirectShow and a real CPU with math coprocessor and pipeline.
No less important is to be able to do this without straining too much CPU, to avoid cooking feeder electrolytic capacitors CPU cores, they are always very close to the CPU and suffer the heat.
The capacitors each 10 degrees centigrade in most halved their lives and here it is working all the time to a film without stops. So beware, CPU consumption must stay below the 20%. Also if you want to be careful also to efficiency is better be much lower. With a good software, based on Direct Show, You can also stay below the 1%.
We are completing Theremino way VideoInput with RGB output.
Our solution would be to use a WebCam so it will work with any video material. The kit Adalight Adafruit, for example,, It can only work if the video signal coming from the computer and not if it comes from digital terrestrial. Using a WebCam you eliminate these problems and you do not need to make complicated links with SCART Sockets, video converters or expensive pass-trough Sockets.
You can use cheap WebCams (even less than 10 Euro) because a minimum quality and a resolution of 320 x 240 are more than sufficient for this application. Finally, Since the CPU consumption is low, You can also read multiple WebCams and note, In addition to the color of the video, even the colour of the sky.


