——
Nuova versione 7 – Anno 2021
Questa versione racchiude tutta l’esperienza accumulata in quasi dieci anni di esperimenti.
In questo capitolo troverete tutta la documentazione necessaria, consultate le versioni precedenti solo se siete interessati alla storia di questo progetto.
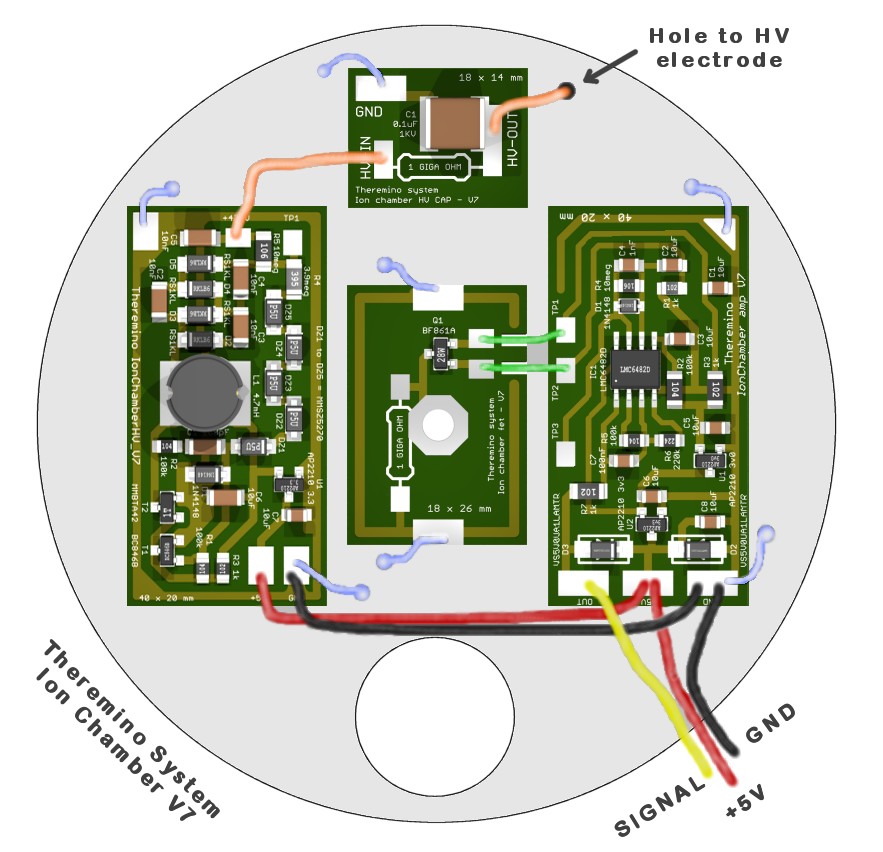
La costruzione è notevolmente semplificata, tutta l’elettronica si trova sullo stesso lato della camera (senza i cavi schermati che utilizzavamo per andare all’amplificatore sulla estremità opposta).
I moduli PCB sono diventati così piccoli e leggeri che si può fissarli con fili rigidi di rame stagnato (azzurri in questa immagine), saldati sulla superficie di lamiera stagnata (o sulla superficie rivestita di nastro di rame nelle versioni professionali della camera).
Inoltre (ma lo vedremo meglio in seguito), coprendo il FET con uno schermo rettangolare e il foro con una fine reticella di ottone, è possibile far lavorare la camera aperta, con l’elettronica completamente accessibile, come la si vede in questa immagine. E questa è una grande comodità quando si devono fare misure sui componenti prima di chiudere la camera.
I miglioramenti sono sostanziali!
- Grande stabilità dei parametri, anche con forti variazioni di temperatura.
- Precisione delle misure notevolmente migliorata.
- Minore rumore di fondo e minore sensibilità ai disturbi.
- Facilità di costruzione.
- Cablaggio delle connessioni semplificato.
- Facile sostituzione dei moduli.
- Possibilità di fare misure sui componenti anche con la camera aperta.
DOWNLOADS – V7
Tutta la documentazione in formato PDF:
Radon_IonChamberV7_Construction_ENG.pdf
Radon_IonChamberV7_Electronics_ENG.pdf
IonChamberV7/Radon_IonChamber_ENG.pdf
IonChamberV7/Radon_Info_ENG.pdf
Radon_IonChamberV7_Construction_ITA.pdf
Radon_IonChamberV7_Electronics_ITA.pdf
IonChamberV7/Radon_IonChamber_ITA.pdf
IonChamberV7/Radon_Info_ITA.pdf
Radon_IonChamberV7_Construction_DEU.pdf
Radon_IonChamberV7_Electronics_DEU.pdf
IonChamberV7/Radon_IonChamber_DEU.pdf
IonChamberV7/Radon_Info_DEU.pdf Ringraziamo Heiner Gerling per le traduzioni in tedesco.
Radon_IonChamberV7_Construction_FR.pdf
Radon_IonChamberV7_Electronics_FR.pdf
IonChamberV7/Radon_IonChamber_FR.pdf Ringraziamo Jacques PAGES per le traduzioni francesi.
IonChamberV7/Radon_IonChamber_ESP.pdf
Tutti i file originali in formato ODT (OpenOffice), per i traduttori:
https://www.theremino.com/files/IonChamberV7/IonChamberV7_OdtDocs.zip
Gli schemi, i PCB e le simulazioni più recenti:
https://www.theremino.com/files/IonChamberV7.zip
– – –
I componenti sono tutti facilmente reperibili ed economici,
l’unico dubbio potrebbero darlo i resistori da 1 Giga,
li potete trovare a buon prezzo seguendo questo link.
La applicazione Theremino Geiger si scarica da This page.
Informazioni sulle versioni precedenti e alcune vecchie immagini in This page.
Se non riuscite a reperire i componenti o a costruire i circuiti stampati
chiedeteli a Lello ( maxtheremino su eBay )
oppure scrivetegli a: ufficiotecnico@spray3D.it
– – –
Ora avete tutto il necessario.
Da qui iniziano le versioni precedenti,
consultatele solo se siete interessati alla storia di questo progetto.
——
Premesse per la versione 6 – Anno 2016
Negli ultimi mesi le ricerche sulla camera a ioni per il Radon hanno portato ad inattesi risultati e nuove scoperte. Parte di queste scoperte sono merito di sperimentatori, sparsi per il mondo, il più attivo è sicuramente Pavel Provaz, che ha già sperimentato un gran numero di configurazioni diverse (e ha inventato la nuova versione a parete singola). In questa pagina riportiamo i risultati delle osservazioni più recenti.
Molti hanno sperimentato che la camera, dopo aver funzionato bene a lungo, improvvisamente perde sensibilità e, dopo un certo tempo, ricomincia a funzionare bene. E si sono chiesti se può dipendere da variazioni dell’alta tensione, o di altri parametri.
RISPOSTE
L’alta tensione non c’entra, può variare da 450 to 550 Volt senza provocare differenze nelle misure.
E anche la tensione sul TP1 è poco significativa, dipende molto dal FET. Alcuni FET hanno una corrente (con Gate aperto) più alta e quindi il TP1 sale un po’. Ma la tensione sul TP1 sale anche, e di molto, in presenza di aria umida. E in queste condizioni il FET amplifica meno.
Per cui questi difetti sono quasi sicuramente provocati dall’umidità dell’aria.
In questi ultimi mesi abbiamo scoperto che l’aria oltre il 70% di RH riesce a condurre decine di pico Ampere (e fino a oltre 500 pA quando ci si avvicina al 90%). Stiamo quindi studiando una camera che possa lavorare anche in ambienti molto umidi (oltretutto senza arrugginirsi)
La prima soluzione pensata fu di deumidificare l’aria (che si invia alla camera attraverso un tubo e una piccola ventola). Il deumidificatore è composto da una serpentina scavata su un lato di un blocco di alluminio da 5 x 5 cm e alto 10 mm, con una cella di Peltier che lo raffredda. La serpentina è rivolta in basso e un panno raccoglie le gocce di acqua e le fa evaporare.
Ma il deumidificatore non è una soluzione molto elegante e consuma molta corrente. Per cui stiamo studiando alcune soluzioni per l’umidità e alcuni miglioramenti, anche per altri aspetti:
- Prima di tutto un elettrodo centrale in tubetto di ottone da 2mm (che migliora di molto anche la resistenza ai rumori meccanici)
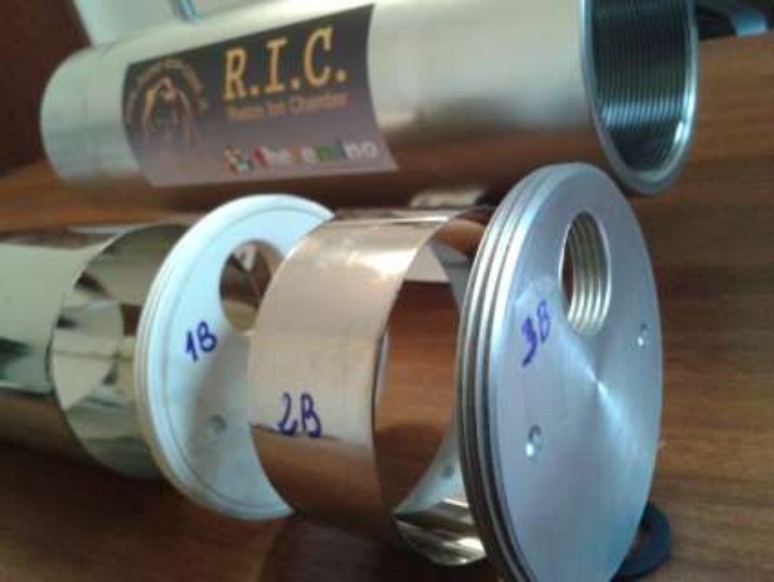
- Una parete esterna in acciaio inossidabile o alluminio.
- Nuovo schema di polarizzazione del FET con Gate del FET a massa attraverso resistore da 1 Giga Ohm che sopporta anche centinaia di picoAmpere di corrente di perdita dell’aria.
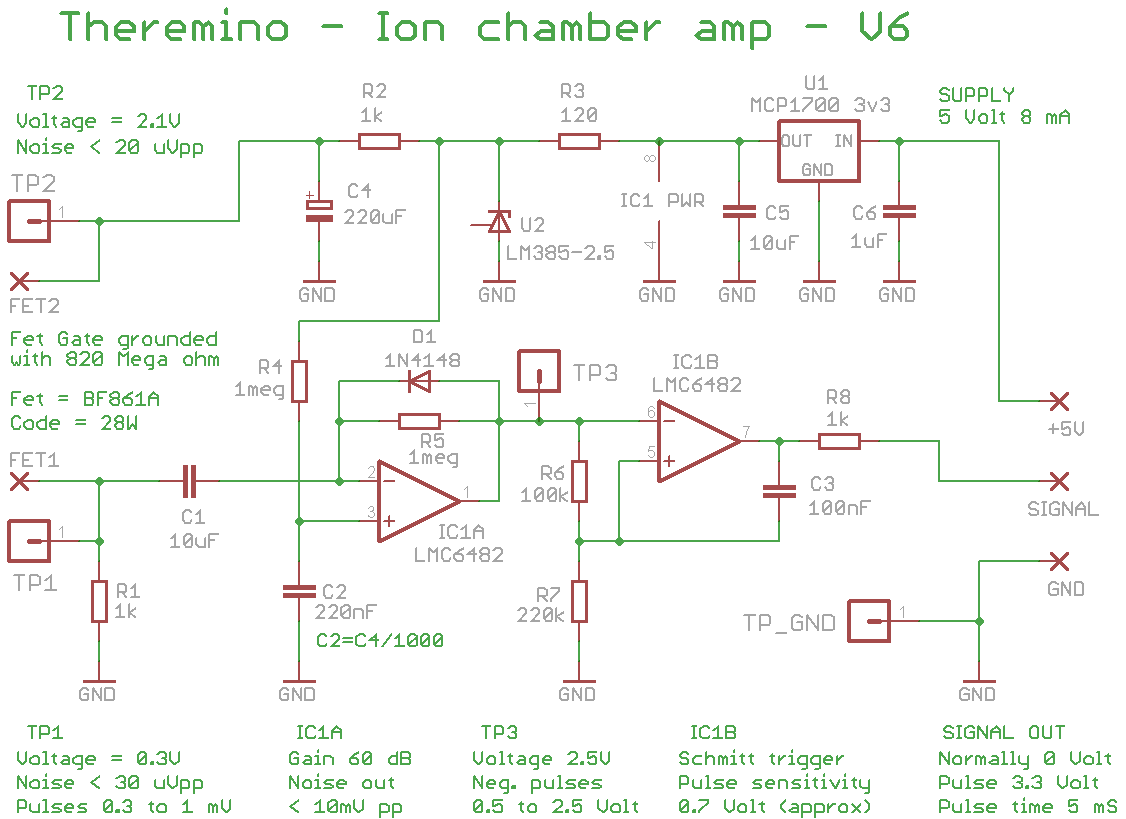
- Nuovo circuito amplificatore (versione 6).
- Tentativi di eliminare la doppia parete, caricando l’elettrodo centrale con 500 Volt (circa) e isolando il Gate con condensatore da 1000pF.
Una nuova interessante idea è di proteggere la camera a ioni dalla umidità chiudendola in un sacchetto di polietilene. Il polietilene ferma sia il vapore acqueo che il Thoron, ma lascia passare il Radon. Il sacchetto di polietilene agisce come membrana polimerica (il radon deve prima dissolversi e quindi diffondere) e deve essere molto sottile per non rallentare troppo la risposta.
Chi volesse fare esperimenti, può rivolgersi ad Alessio, che sa come reperire i componenti e può preparare i nuovi PCB.
Nuovo amplificatore – Versione 6 – Anno 2016
Da questo indirizzo si può scaricare lo schema, il PCB e le simulazioni più recenti:
https://www.theremino.com/files/IonChamberAmpV6.zip
E qui si possono comprare economici resistori da 1 Giga:
http://www.mouser.it/ProductDetail/TE-Connectivity/RGP0207CHK1G0/?qs=%2fha2pyFaduhkrdcbzNk6CHQ1bfgoVndRtlEgfJiN2nuM8RBuTFoG3A%3d%3d
Attenzione che il resistore deve stare COMPLETAMENTE DENTRO alla camera interna, altrimenti raccoglie disturbi e non funziona più niente.
Notare che se si polarizza a massa il Gate la tensione sul TP1 diventa circa 0.3 Volt e non viene più modificata dall’aria umida (prima il voltaggio normale su TP1 era da 1.1 to 1.3 Volt e saliva molto, anche oltre 1.5 Volt, in presenza di umidità. E quando il voltaggio sul TP1 sale, il FET amplifica meno, e si verifica una forte perdita di sensibilità agli impulsi di bassa ampiezza. Per cui si contano meno impulsi.
Le ultime versioni includono anche un regolatore LM385 che riduce ulteriormente (oltre 30 volte) il rumore in arrivo dalle USB. Questo migliora il funzionamento su alcuni PC particolarmente rumorosi.
Le ricerche più recenti hanno evidenziato che una forte umidità dell’aria, oltre a condurre una corrente di centinaia di picoAmpere, provoca anche variazioni rapide di corrente. Queste variazioni si traducono in un forte rumore sovrapposto agli impulsi (visibile sul TP3 con un oscilloscopio). Il tutto viene amplificato dalla presenza di pulviscolo nell’aria (la polvere si inumidisce e aumenta di molto i disturbi)
Non sappiamo quindi fino a che livello di umidità si potrà arrivare, ma siamo abbastanza sicuri che, oltre il 90% di umidità, i disturbi diventano di tale ampiezza, che nessuna camera a ioni, comunque sia costruita, potrebbe funzionare.
Nuovo alimentatore alta tensione – Versione 5 – Anno 2015
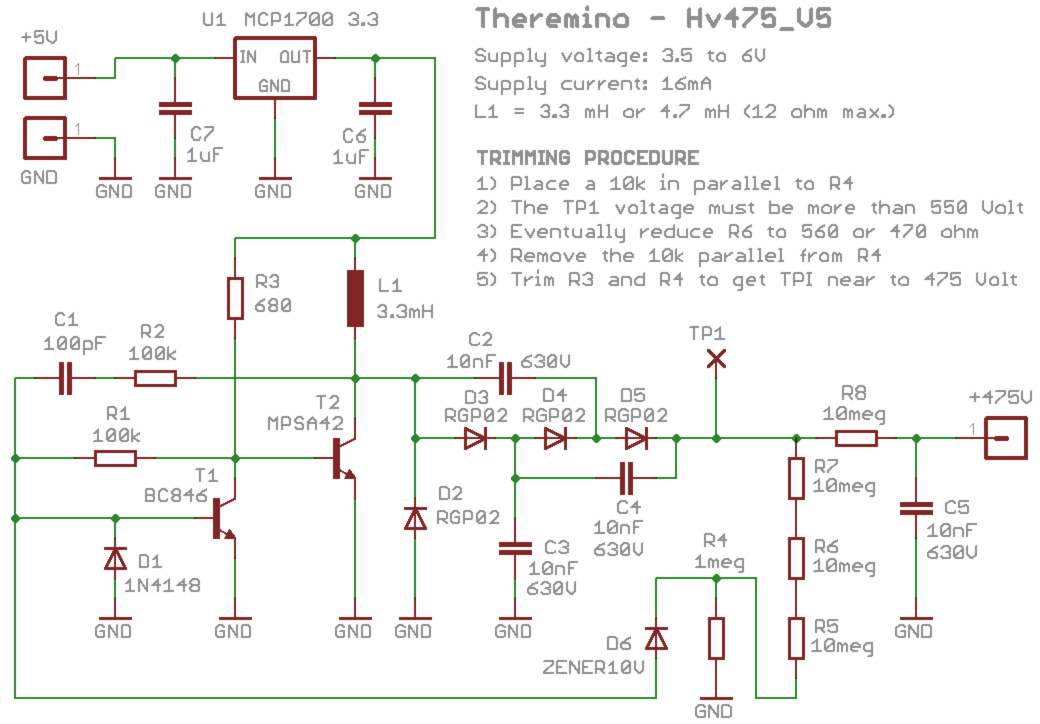
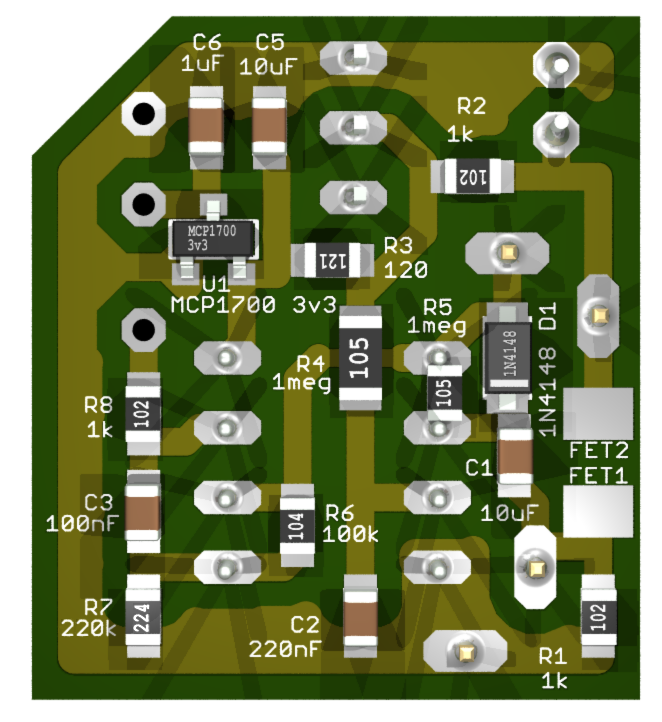
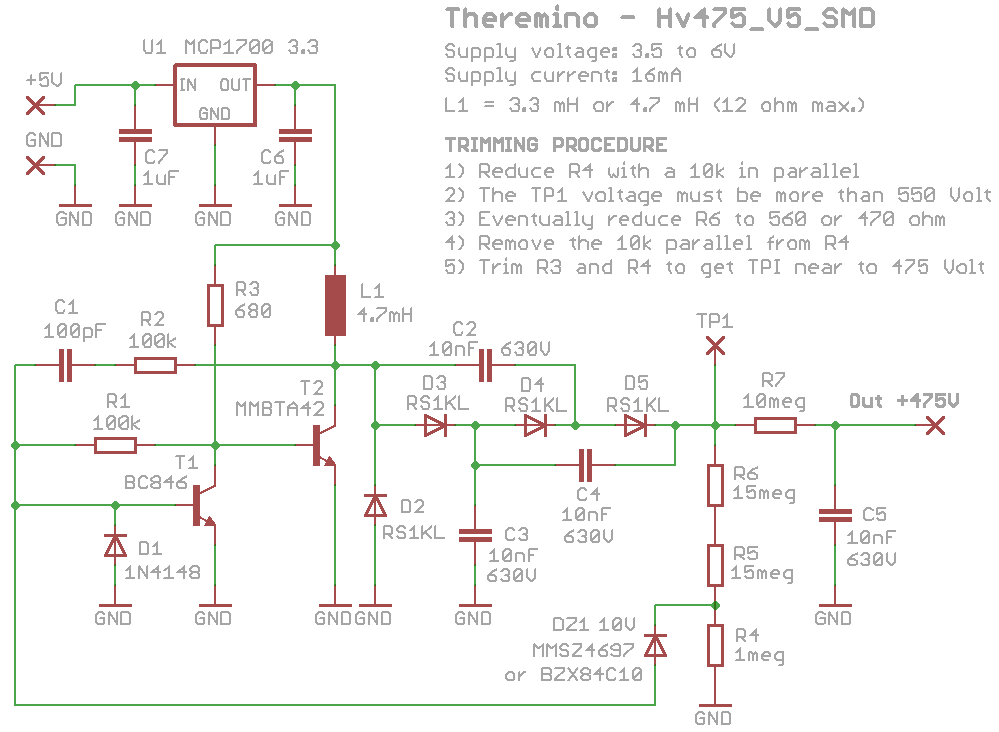
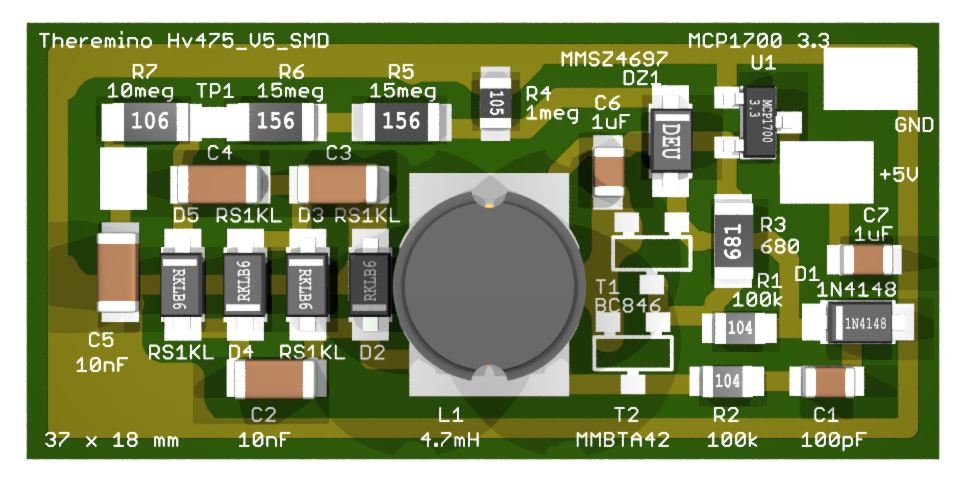
 Schema e PCB dell’alimentatore versione 5, con componenti tradizionali.
Schema e PCB dell’alimentatore versione 5, con componenti a montaggio superficiale.
Aggiungendo un regolatore a 3.3 Volt si evita che l’alta tensione venga disturbata dal rumore proveniente dalla USB. La linea di base che si misura sul TP3 è più stabile e quindi e misure sono più precise. Su alcuni PC con tensione USB molto rumorosa questo nuovo alimentatore può fare grande differenza.
Con questo link si può scaricare lo schema, il PCB e le simulazioni, sia dell’amplificatore che degli alimentatori, sia in versione SMD che con componenti classici: IonChamberCircuits
Importante miglioramento della stabilità
In the last year (2017-2018), alcune camere a ioni hanno dato problemi. Improvvisamente iniziavano a generare un numero esagerato di impulsi. In altri casi gli impulsi non sembravano causati da una effettiva concentrazione di Radon. Questi episodi sembravano correlati con i cambi di temperatura.
I test elettrici non mostravano nessuna anomalia, per cui per lungo tempo abbiamo dato la colpa a cause meccaniche e particelle di polvere. Purtroppo le camere che facevano difetti smettevano di farli appena si cambiava qualcosa. Bastava aprirle, move the wires and connect them to the oscilloscope and magically they correct alone.
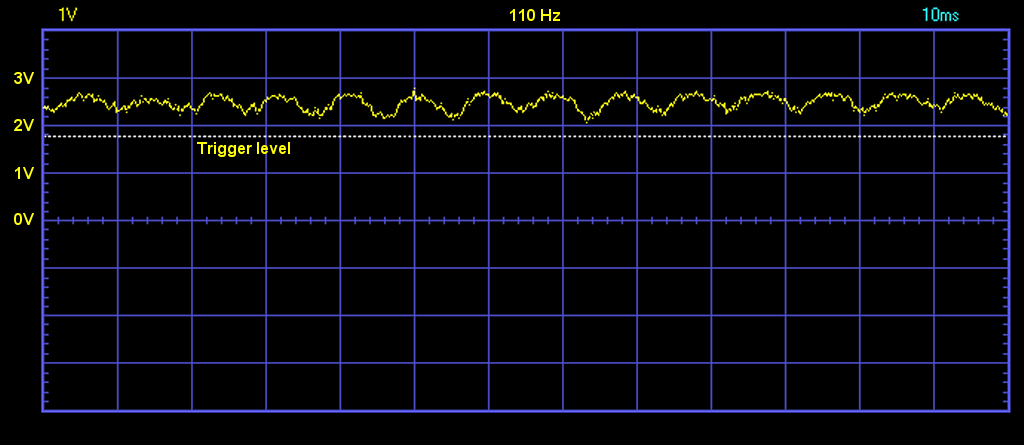
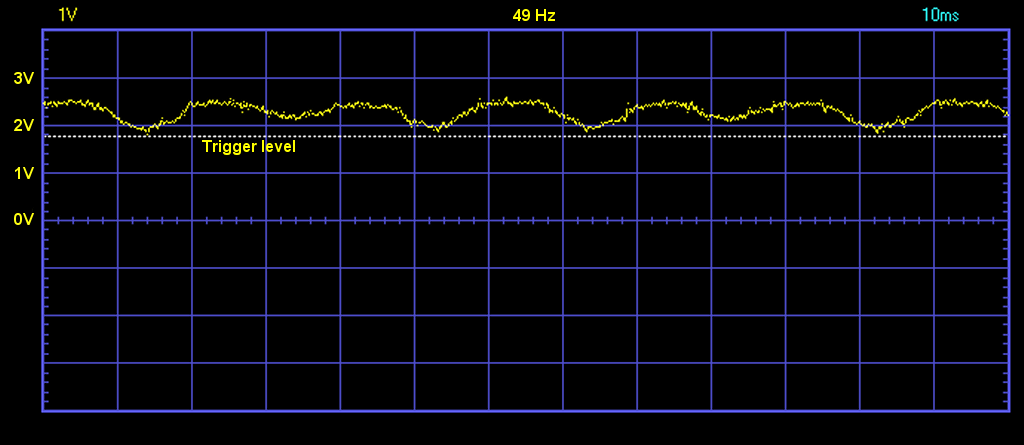
Finalmente (15 luglio 2018), una camera ha iniziato a “fare la matta” while the oscilloscope was connected. E fortunatamente il segnale sul TP3 ha mostrato una anomalia. Un dondolio a frequenze molto basse.
La frequenza di questa oscillazione cambiava continuamente, se saliva la sua ampiezza diminuiva, se scendeva la ampiezza aumentava. Scendendo sotto ai 50 Hz aumentava di ampiezza fino alla linea di scatto, e quindi rischiava di innescare falsi conteggi, come si vede nella prossima immagine.
Ulteriori prove hanno evidenziato una autooscillazione ad alta frequenza, the output of the integrated high voltage stabilizer U1 feeder. E una frequenza di oscillazione dipendente da minime variazioni della capacità esterna (spostare fili o aprire o coperchi metallici), o variazioni della temperatura.
In alcuni momenti la frequenza di autooscillazione, avvicinandosi molto alla frequenza di oscillazione del transistor T2 (ambedue di circa 10 KHz), generava un battimento a bassa frequenza (sotto i 100 Hz).
Le frequenze molto basse, non essendo filtrate efficacemente dai condensatori C3, C4 e C5, provocavano un continuo dondolio della tensione sul punto TP3. Questo dondolio poteva raggiungere anche tensioni superiori a un volt e così iniziava a produrre impulsi spuri.
Una volta compreso il problema la cura è stata semplice. Eliminare la autooscillazione aumentando i due condensatori (C6 e C7) fino a 10 uF. Il datasheet dello MCP1700 consiglia proprio il valore di 10 uF per evitare autooscillazioni, ma questa informazione purtroppo era poco evidente ed è “sfuggita”.
Per migliorare ulteriormente la stabilità, si aggiunge anche un condensatore da 220 uF (elettrolitico da almeno 10 volt) sul connettore che porta i 5 volt in ingresso alla camera.
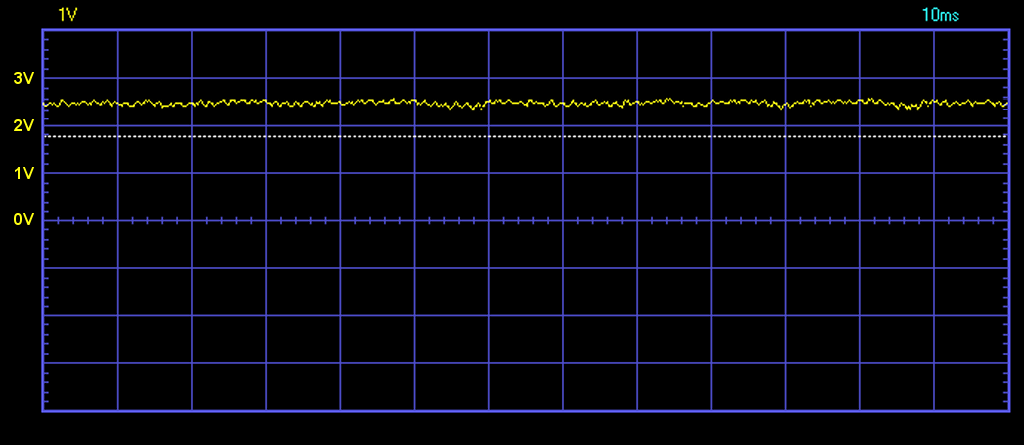
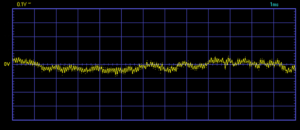
La seguente immagine mostra che con queste modifiche la tensione sul TP3 è stabile, senza più tracce di ondulazione. Il segnale è costantemente ben lontano dal punto di scatto (quasi un volt), per cui il rischio di impulsi anomali è completamente eliminato.
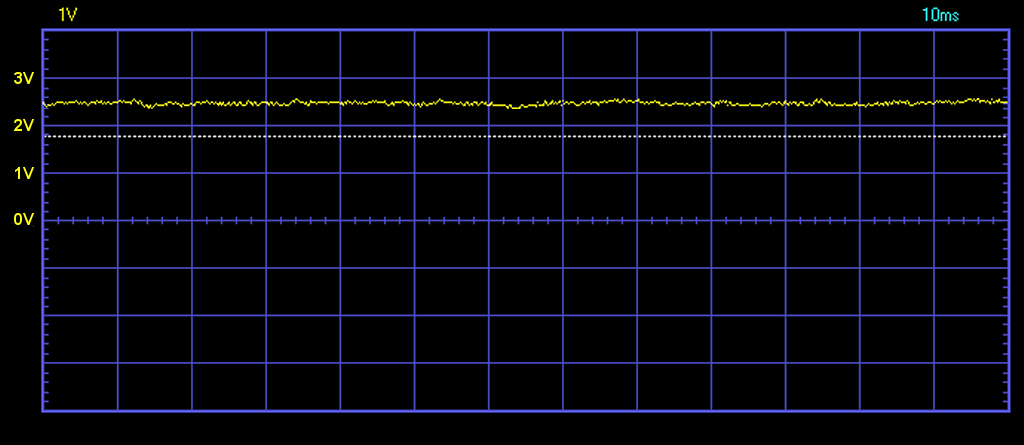
In questa immagine si vede ancora una leggera ondulazione, that was caused by too close to the center electrode fan. Allontanando la ventola di due centimetri anche questo disturbo viene eliminato. In the next image we can be seen that the only remaining noise is random noise caused by the ionization of the air.
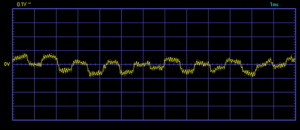
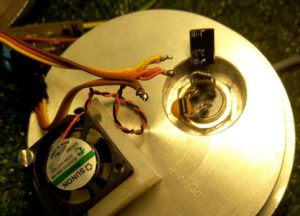
Nelle due immagini seguenti si vede un ingrandimento del disturbo provocato dalla ventola.
Nella prima immagine la ventola era posizionata vicina alla camera interna, nella seconda è stata allontanata di 20 mm.
Il disturbo causato dalla ventola è ben riconoscibile perché è una onda quadra con frequenza di circa 500..1000 Hz. Instead, the high frequency ripple (circa 10 KHz) It is the residue of the high voltage supply commutations.
Questi disturbi residui (anche quello provocato dalla ventola), sono veramente minimi e non possono creare problemi. Ma è bene saperli riconoscere e controllare che non superino i 100 mV picco picco.
Correzioni rispetto ai progetti precedenti
Ora la tensione sul TP3 è più stabile di quanto sia mai stata, per cui sarebbe bene correggere tutte le camere costruite in precedenza, con i due condensatori ceramici da 10 UF and electrolytic 220 uF.
Also last year, a room was damaged by lightning (aveva un lungo cavo di collegamento tra il Master e la camera). Quindi per evitare questo rischio, sarebbe bene aggiungere due diodi zener, uno tra GND e +5V, and the other between GND and the signal. Questi zener devono essere da circa 6 o 7 volt (ad esempio gli 1N4735 o 1N4736), and must have the anode (il lato senza fascetta) collegato a GND. Sarebbe bene aggiungere gli zener su tutti e due i connettori, due sul connettore della camera a ioni, e due su quello della scatoletta che contiene il Master.
E infine, per attenuare i disturbi transitori provocati dalla accensione di grossi carichi, si potrebbe aggiungere un condensatore ceramico a disco da 100 nF, sul connettore, right at the entrance of the room.
Come effettuare le correzioni
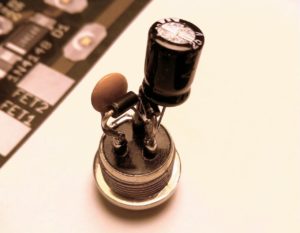
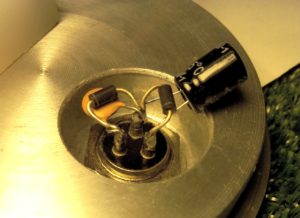
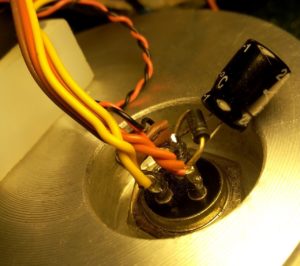
Nelle prossime immagini si vedono i componenti saldati direttamente sul connettore.
Questo è un esempio robusto ed efficiente (They delete own entrance disorders). Ma ci vuole abilità con il saldatore. Per cui in alcuni casi potrebbe essere meglio adottare disposizioni diverse, o addirittura un pezzetto di circuito stampato o di millefori.
“Concentration” o “Activity”, questo è il problema!
Fino a pochi mesi addietro misuravamo la “Concentrazione di Radon”, mentre ora misuriamo in “Radon Activity”. Ci siamo dovuti adeguare a questa usanza per dare valori simili agli altri misuratori di Radon in commercio.
Per tarare la camera a ioni in “Radon Concentration” il valore da impostare è 2.15 CPS/Bq/l. Con questa taratura i valori in Bq/l e Curie/l saranno circa cinque volte inferiori.
Per tarare la camera a ioni in “Radon Activity” il valore da impostare è 0.43 CPS/Bq/l. Con questa taratura i valori in Bq/l e Curie/l saranno simili a quelli misurati con gli altri apparecchi in commercio.
Nella relazione della commissione europea ci sono ottime definizioni delle due unità di misura.
- “Con “misurazione delle concentrazioni di radon” si intende il numero di disintegrazioni del solo isotopo Rn-222.
- Con l’espressione “esposizione al radon” si intende invece l’esposizione ai prodotti di filiazione del radon.”
Premesso che ci siamo convinti, se tutti usano la attività lo faremo anche noi. Vogliamo però far notare che si “dovrebbe” misurare la “Concentrazione di Radon” e dare valori circa cinque volte inferiori, come suggerito da tutte le organizzazioni internazionali.
Documentazione che suggerisce di usare la “Concentrazione”
Sia “Word Health Organization” che la “Unione Europea” suggeriscono di usare la “Concentrazione di Radon”
https://www.uic.edu/sph/glakes/radon_measurement/pdfs/unit_three.pdf
http://www.atsdr.cdc.gov/PHS/PHS.asp?id=405&tid=71
The World Health Organization has recommended a radon reference concentration of 100 Bq/m3 (2.7 pCi/L).[82] The European Union recommends that action should be taken starting from concentrations of 400 Bq/m3 (11 pCi/L) for older dwellings and 200 Bq/m3 (5 pCi/L) for newer ones.[83]
http://en.wikipedia.org/wiki/Health_effects_of_radon#Radon_concentration_guidelines
Radon concentrations in the air are measured as the amount of radioactivity (Bq) in a cubic metre of air: http://www.who.int/ionizing_radiation/env/Radon_Info_sheet.pdf
The concentrazione di radon si misura in Becquerel per metro cubo (Bq/m3 ). Il valore di 400 Bq/m3 indica la disintegrazione di 400 nuclei atomici di radon al secondo in un metro cubo d’aria accompagnata dalla emissione di radiazioni ionizzanti.
Radon concentration scale
http://en.wikipedia.org/wiki/Radon#Concentration_scale
Ma allora perché tutti i costruttori di apparecchi simili usano la “Attività di Radon”?
Probabilmente perché in questo modo si superano più facilmente i limiti di legge e diventa più facile proporre costosi interventi di risanamento. Questa è solo una nostra supposizione, ma fino a che qualcuno non ci suggerirà una spiegazione migliore…
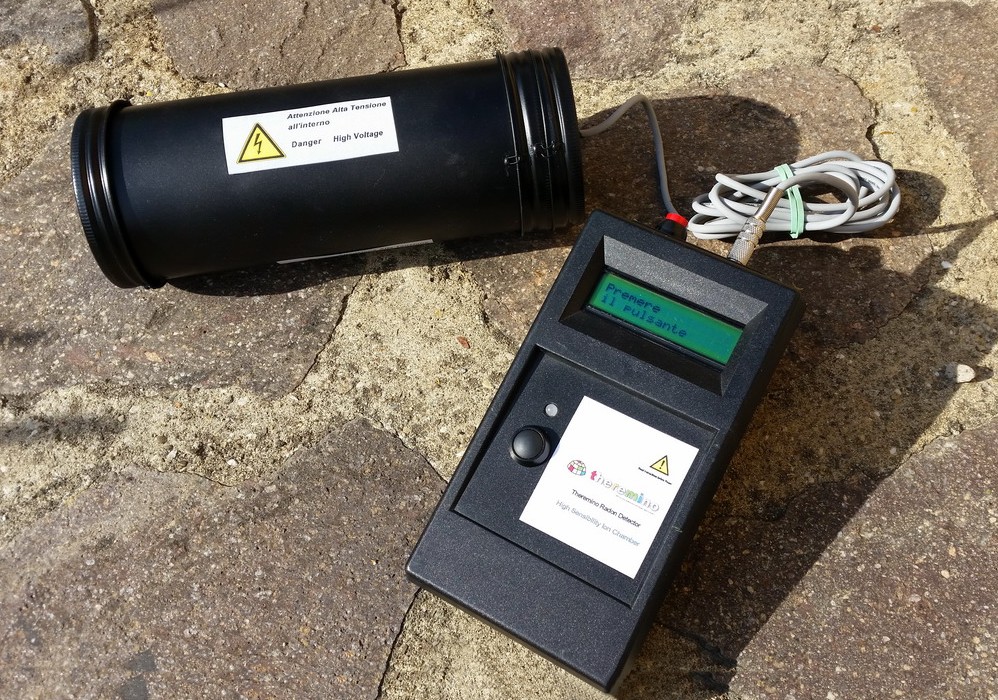
Una camera a ioni “embedded”
Alessio ha sviluppato una camera a ioni con tutto il software in un microcontrollore PIC. Questa soluzione è particolarmente economica perché non necessita di un PC (o tablet).
Con un solo pulsante si manovrano tutte le funzioni. Il display indica la versione, attualmente “Radon Detector Ver. 1.0”, i secondi trascorsi e la concentrazione di gas Radon in Bequerel per metro cubo.

William ci ha scritto:
Ho sperimentato una perdita di sensibilità di circa quattro volte, in condizione di aria secca (circa 50% dei giorni scorsi). Potrebbe essere causata dalla “ossidazione” dell’elettrodo centrale? E quindi da una minor conduzione delle scariche, prodotte dalle disintegrazioni, dall’aria al rame?
Risposte:
Per quanto l’ossidazione degli elettrodi diminuisca la conduzione, non influisce sulla ampiezza degli impulsi, i motivi sono i seguenti:
1) La corrente degli impulsi è talmente piccola che anche una resistenza molto alta (ossido spesso) non diminuisce la ampiezza in modo misurabile.
2) Per quanto gli elettrodi si ossidino, esiste sempre qualche spazio tra i punti ossidati (perforazioni microscopiche dell’ossido) e queste perforazioni, unite al leggero strato conduttivo che si forma sempre su tutte le superfici per effetto della umidità, portano ad avere comunque una superficie in contatto elettrico con il metallo. Magari si tratta di contatti con resistenza altissima, magari saranno centinaia di mega ohm, ma l’unico effetto di questa resistenza sarà solo di rallentare la salita degli impulsi. Alla fine comunque tutte le cariche arriveranno dove devono arrivare e non si noterà nessuna diminuzione della ampiezza degli impulsi.
3) Abbiamo verificato questo rivestendo l’elettrodo centrale con un foglio di carta. La carta “dovrebbe” essere isolante ma ha in realtà una resistenza di decine di giga ohm. E il risultato è stato di avere impulsi esattamente uguali a quelli di un elettrodo non “isolato” con la carta.
Perdita di sensibilità
———————————————————————————–
Dato che non avevi una forte umidità allora non sappiamo dirti cosa può essere successo. Suggeriamo comunque di controllare spesso il TP1. Se ci sono perdite (dovute alla umidità o altro) la tensione sul TP1 sale e quando arriva a 1.5 Volt e oltre la sensibilità diminuisce molto e si contano pochi impulsi.
Impulsi a raffica
———————————————————————————–
Se invece si contano impulsi a raffica si deve controllare TP3 con l’oscilloscopio. Se si tratta di 50Hz allora si deve migliorare la schermatura (reticelle di ottone doppie sui fori). Se invece sono ondulazioni casuali allora potrebbe trattarsi di conduzione provocata dall’aria umida.
Volevo aggiornare la situazione a riguardo del commento sopra postato in mio nome da Livio.
Dopo una revisione della camera operata da lui, con sostituzione di qualche componente difettoso, la sensibilità e stabilità della camera è arrivata a livelli davvero elevati.
Ho implementato, sfruttando i canali liberi, i sensori di pressione, temperatura ed umidità (grazie al buon Alessio!!), in modo da avere un quadro completo delle variazioni delle condizioni di misura (eventuali ventilazioni intervenute durante la misurazione) che possano far variare i dati.
Vi lascio con un grafico “fresco fresco” realizzato in condizione di bassissima concentrazione (ambiente dotato di ventilazione meccanica controllata).
https://drive.google.com/file/d/0ByNPlNE2fCMqT1ZZeDZwTENxMkE/view?usp=sharing
Nella realizzazione della camera a ioni non mi è chiaro a quale potenziale va collegata l’armatura del barattolo con i coperchi.
Se si tratta di una schermatura, dovrei collegare al “ground-earth” (terra/riferimento) oppure è meglio lasciarla floating ?
Non trovo sui disegni questa informazione e vi sarei grato se riusciste a chiarirmi questo punto.
Grazie a tutto il gruppo e complimenti per l’ottimo lavoro.
Va collegata a GND.
Il punto migliore è il negativo del connettore dove arrivano i tre fili dal Master.
Se si lascia volante i disturbi esterni, in arrivo dall’impianto elettrico, saturano il preamplificatore e non funziona più niente.
In questa pagina ci sono molte informazioni utili:
https://www.theremino.com/hardware/inputs/radioactivity-sensors
Grazie Livio per la tua risposta.
Avrei qualche altra domanda : come si può essere certi che le misure ottenute con la camera ionica dipendono effettivamente da radiazioni del Radon ?
Se si utilizza un geiger, anzichè la camera ionica, è possibile che il conteggio sia in parte dovuto alla presenza di Radon ?
Per concludere: non è forse vero che le radiazioni alfa/beta e gamma sono tutte rivelabili utilizzando il concetto di ionizzazione ?
Grazie per la tua grande pazienza, Mario
Beta e gamma ionizzano anche loro, ma il numero di molecole che vengono ionizzate da ogni disintegrazione è circa cento volte minore di quelle prodotte da una disintegrazione alfa.
Inoltre le disintegrazioni del Radon (e anche del Thoron) hanno energia dai 5 ai 7 Mega elettronVolt, contro appena qualche centinaio di KeV dei beta e gamma prodotti da quasi tutte le sostanze radioattive.
Per cui gli impulsi elettrici che si sviluppano dopo il FET sono decentemente grandi per Radon e Thoron ma talmente piccoli da essere assolutamente non misurabili per tutto il resto.
In ogni caso una camera a ioni a conteggio come la nostra i beta e i gamma non li vede proprio. Per essere sicuri abbiamo usato campioni molto energetici di varie sostanze e non abbiamo mai visto impulsi prodotti da altro che dal radon.
I decadimenti del Radon e dei suoi figli fanno solo Alfa e Beta. Questi Beta sono deboli, solo qualche centinaio di KeV e (per quanto rivelabili da un geiger) si confondono col fondo naturale al punto da non essere misurabili.
Infine, i tubi geiger hanno un volume sensibile piccolissimo, forse mille volte inferiore rispetto al litro della nostra camera a ioni. Per cui in un ambiente dove misuriamo una disintegrazione di radon al minuto, un gaiger misurerebbe una disintegrazione ogni mille minuti (sedici ore) e questo conteggio verrebbe del tutto mascherato dai conteggi dovuti al fondo ambientale, cento volte più frequenti.
Grazie ancora Livio e complimenti per il progetto. Siete un gruppo formidabile di appassionati.
Personalmente sono estremamente incuriosito dal fenomeno Radon e dalla radioattività in generale.
Purtroppo trovo che la realizzazione della camera di ionizzazione e dei moduli elettronici è molto laboriosa e fornisce un risultato di sapore hobbistico, ma credo di essere giunto alla fase finale.
Mario
Di hobbistico c’è solo il costo dei materiali. Quando è stata comparata con attrezzature professionali (non facciamo nomi per correttezza) è risultata superiore in tutto. Principalmente più veloce ma soprattutto usabile comodamente. Collegandola a Theremino Geiger, si ottiene un grafico già significativo in tempi brevissimi (mezz’ora), mentre altre camere “professionali” ancora ruminano al loro interno per poi dare, dopo molte ore, un singolo numero.
The chamber outer wall needs to be connected directly to amplifier ground pin, or connected to ground with minimum 100uF capacitor. OR you have to connect the minus of the amplifier to some external ground by wire. So 3 setups are possible and working. Otherwise you will experience very high noise.
In fact, there needs not to be any shileding of the chamber, you can use only a single wall can. I have tested that and I’m still using it in one of my devices. But in that case (if there is not GND on the chamber wall, but positive or negative high voltage), you have to increase the output HV capacitor to 100uF, otherwise the noise will be very high (it acts in this case also as a high pass filter, connecting the chamber wall noise to ground. With this capacitor value the additional induced noise is reduced to not detectable and a single non grounded can can be used, but it is very dangerous and also the startup time is longer… I would recommend that only in case you are encorporating the radon meter into some insulated housing box. Also a 100uF cap for that high voltage is quite expensive. On the other side it is much easier to DYI.
As mentioned above, I have also tested a configuration with a single grounded can wall and central electrode injected with high voltage. It works well and it is obviously much safer. But the S/N Ratio achievable with this setup is little lower (less than 70%) and also a performance in high humidities is little worse. And, of course, because in this case the chamber is of one potential, a higher calibration factor must be determined, because the whole chamber surface is active (There is no loss of ion stream at both chamber ends, as in original version).
Heh, my name was translated automatically from Provaz to “Rope”, when entering the answer :-)
We do not use a 1 uF capacitor bur only about 33 nF that is not dangerous. Then to reduce the noise we use a 10 to 100 Mega ohm resistor and a HiVoltage generator with a double stabilized power supply.
But your solution with the central electrode charged with high voltage can work very well. Now we have no time, but sooner or later we will test this configuration and publish a modified version. Thanks for your tips.
It is possible, that this 10 to 100 Mega resistor will affect performance in high humidity environment (over 80%). It may cause lowering of the high voltage and thus a loss of sensivity. But it is safer, that is absolutely true.
Livio, ho eseguito le prime prove della camera ionica, tuttavia, pur misurando l’alta tensione (sul TP) a circa 500VDC e l’amplificatore con le corrette polarizzazioni, non riesco a ottenere gli impulsi neppure dopo 30′ di attesa. Ho impostato ciò che mi sembrava più corretto (Ion Chamber sensor, etc) nel programma, utilizzando in HAL: pin1 – slot1 – counter mode sul master.
Il master lampeggia velocemente, ma mi sembra che non arrivino mai impulsi. And’ possible avere un setup di esempio per il programma IonChamber.exe da utilizzare per il Radon ? Grazie.
PS: dato che i moduli della Ion Chamber (HV e AMP) sono realizzati con componenti non SMD e quindi sono “alti”, risulta impossibile chiudere con il coperchio come indicato nel progetto. Ho dovuto aggiungere un altro coperchio come spessore, saldato agli altri due, per creare un gap. Se rimangono delle fessure occorre tapparle con nastro adesivo in Al o possono rimanere senza problemi ?
Grazie ancora, Mario
Ciao,
se rimangono fessure, o non metti correttamente a massa tutti gli schermi, non funziona più niente.
Se ci sono fili lunghi anche in questo caso non funziona.
La camera è delicata e va montata senza fare “variazioni” rispetto al progetto.
Se imposti uno Slot di uscita nel theremino geiger diverso da quello nell’hal allora non funziona (prova a batterle sopra, se gli slot sono a posto deve contare)
Sull’hal devi impostare Counter e non CounterPU.
Se proprio non funziona potrai mandarla a Alessio che te la metterà a posto.
Sarebbe interessante capire come siete arrivati ad usare 2.15 CPS/Bq/l. come fattore di taratura.
Potrai chiederlo con più precisione a Marco Catalano di Lacerc (certificazioni OnLine):
https://www.theremino.com/contacts/about-us#marco
Per ora ti rispondo quello che ricordo…
1) Il fattore di taratura è stato modificato per adeguarsi ai misuratori che contano anche le disintegrazioni dei discendenti del Radon. Non sarebbe giusto ma fanno tutti così.
2) Il fattore attuale è quindi 0.43 CPS/Bq/l.
3) Per arrivare a questo dato Marco ha preparato un apposito apparecchio con tubi, ventole e una sorgente di Radon. Poi è andato in un laboratorio a confrontarlo con altri misuratori sicuri. Non ricordo il nome ma mi pare fosse un laboratorio dell’Arpa.
Se serve altro chiedi pure o scrivici a engineering@theremino.com
Livio, ho realizzato Theremino con la Ion Chamber per il Radon e, in seguito, essendo un grande appassionato di elettronica, ho pensato di collegare la Ion Chamber a una schedina dotata con LCD che ho disegnato appositamente per contare i CPM del sensore. Il microprocessore è un PIC16F876 che ho programmato con MPLAB-X in XC8. Il prototipo funziona bene e a ogni disintegrazione lancia un impulso su un LED e invia un click al buzzer piezo.
Ora vorrei visualizzare non solo il valore CPM, ma anche la dose equivalente in uSv/h. Poi lo utilizzerò anche con un sensore Geiger (SBM-20) di cui è già nota la costante di conversione.
Ma per la camera ionica come faccio a convertire i CPM in uSv/h ? Grazie e buon lavoro. Mario
La formula grezza la puoi ricavare da ThereminoGeiger, ma ancora più facilmente ti consiglio di prevedere un numero K.
Poi farai: uSv/h = CPM * K
All’inizio imposterai K = 1.000 e poi lo modificherai per confronto con Theremino Geiger fino ad avere letture simili.
Comunque senza Theremino Geiger che fa la media nel tempo e il grafico avrai dati grezzi e poco significativi. Sarebbe molto meglio usare un Tablet da 8 pollici da 49 Euro con Windows 10 e Theremino Geiger. Ti fornirebbero anche la alimentazione, la batteria a l litio e il suo caricabatterie da rete a norme CE, il touch screen, i suoni dei click, il Wifi se vuoi vederlo da lontano… Oppure, anche meglio un Meegopad da 80 euro che è piccolissimo e consuma solo 200 mA a 5 Volt.
Il tutto controllabile da lontano con TeamViewer via Wifi e anche via Internet.
Hello,
I made Ion Chanmber for radon according to your circuit diagram and it functioned very well.
However, the noise caused by the weak breeze and vibration is also counted.
Is there any ways to reduce the noise?
Hi, Dominic
the only method to reduce noise is a more rigid mechanical construction.
– The central electrode should become a small brass tube (of those used to obtain fuel in model aircraft).
– The outer cylinder should be a thick, heavy aluminum cylinder.
One of our collaborators “Marco” builds professional ion chambers with this method
and they are considerably less sensitive to vibrations.
https://www.theremino.com/en/contacts/about-us#marco
Here you can see the professional version:
https://www.theremino.com/blog/geigers-and-ionchambers/ionchamber-improvements
Last professional version are simplified,
the number of internal components is reduced
and it is more easy to open end close them.
https://www.theremino.com/en/hardware/inputs/radioactivity-sensors
Hi there….
Could the Texas LMP7721 be a candidate for further development. It seems that is is designed for also ion chambers, and with a low bias current of 3fA? Maybe to elliminate the BF861?
http://www.ti.com/product/LMP7721
Best regards Murdock.
No, it will self-oscillate.
The FET must be physically inside the chamber, so the GATE remains fully shielded.
The FET GATE does not have to “see” the other parts of the circuit, otherwise the microscopic capacities that are formed through the air, would collect the output signals of the first amplifier stage, and also the strong square wave signals of the final output.
These signals are millions of times larger than what we have to measure. So they would cause strong input noises, that will be amplified and cause a self-oscillation of the whole circuit.
Hi.
I have built a ion chamber ( Tomato can ) approx 52mm x 65mm (140ml) driven with 250Vdc. It works great with almost no noise on the baseline. But how do i find the best suited voltage for a smaler chamber. Do you have some doc whit regard to this issue?
Best Regards
Murdock.
The best voltage is about 100 volts every 10 mm of radius.
Increasing this tension has a small increase in sensitivity, but a greater instability and noise produced by the humidity of the air.
Hi again.
I’m having trouble figuring out if the chamber shell it self is floation or grounded?
Best rgd John Hansen
Have just found the answer in earlyer reply ……
Ok thanks.
Hi Livio.
Is it possible read out the absolutely max. puls amplitude for the (PO214- 7,4 mev) and min. (po210-5,3 mev) and the back calculate the threshold level to detect only randon and discriminate beta’s?
Lets say that po214 is 100% puls and po210 is around 65%, then the threshold is set to lets say 60%????
Why do i ask, because i have changed the gain on the amplifier so i wont get flat/chopped pulses that goes below “0V”. I also have a sleight different size of the chamber.
Best Regards J
ENGLISH
Not only the energies count but also the ionizing power. Alpha rays have an ionizing power hundreds of times greater than gamma rays, and a thousand times greater than beta ones. Therefore, beta and gamma rays do not produce measurable electrical impulses in a counting ion chamber like ours.
The threshold does not serve to exclude beta and gamma but to reduce sensitivity to mechanical disturbances. Raising the threshold reduces the number of counted pulses somewhat, because it excludes the weakest impulses. The weak impulses are not weak due to a different energy, but because the disintegration occurred near the metal wall or in the terminal areas of the chamber where the electric field is smaller.
ITALIANO
Non contano solo le energie ma anche il potere ionizzante. I raggi alfa hanno un potere ionizzante centinaia di volte maggiore dei raggi gamma e mille volte maggiore di quelli beta. Per cui i raggi beta e gamma non producono impulsi elettrici misurabili in una camera a ioni come la nostra.
La soglia non serve per escludere beta e gamma ma per ridurre la sensibilità ai disturbi meccanici. Alzare la soglia riduce in po’ il numero di impulsi contati, perché esclude gli impulsi più deboli. Gli impulsi deboli non sono deboli a causa di una differente energia, ma perché la disintegrazione è avvenuta vicino alla parete metallica o nelle zone terminali della camera dove il campo elettrico è minore.
Dear Livio
I’m building now the Radon Chamber.
I have the chamber with dimensions outer fi=80 mm, sheld chamber fi=90 mm, central electrode as rod fi=2.7 mm, all parts from SS. Distance between two cylinders is made from two epoxide laminate rings (no polymer film).
At this moment I have two options: as your project and my proposal – negative tension connected to shelding chamber (on GND potential), the chamber with fi=80 mm connected to gate of FET’s (the gate of FET’s connected to GND with 1 GigaOhms resistor) and the positive tension of 480 V connected to central rod. And your oppinion is???
Additional, in your project, the picture “DSCN4252,JPG” from the chamber doccumentation (V6) is unclear. I can find 10×82 MegaOhms resistor, the vertical pipe is probably central (?) electrode with connector to the FET’s gate. But the copper ring is for????? And method of mounting in the chamber???
Rispondo in italiano perché mi viene più facile, per piacere traduci con Google oppure consultando il sito nelle pagine tradotte.
Non abbiamo mai provato a collegare il gate del fet al cilindro esterno e il positivo all’asta centrale, quindi non so dirti come potrebbe funzionare. Vedo però un problema causato dalla grande capacità elettrica che si creerebbe, tra il cilindro (quindi GATE) e la schermatura esterna. Molto probabilmente questa capacità attenuerà gli impulsi così tanto da rendere impossibile distinguerli dal rumore.
Nella immagine di cui parli i resistori da 82 mega sono solo uno dei molti modi di collegare il gate a GND con circa 1 giga ohm. Potresti invece usare un resistore assiale singolo da 1 giga, che si trova su Mouser o altri rivenditori.
Il tubo verticale è l’elettrodo centrale e il connettore serve per collegare il FET.
L’anello di rame adesivo serviva come base per saldare una schermatura, nelle prove con camera aperta (tieni conto che tutto deve essere schermato molto bene, altrimenti capti la rete elettrica e non vedi più gli impulsi).
Questa immagine era solo un esempio per far vedere come costruire un resistore da 1 giga con resistori da 82 mega, che costano pochi centesimi. La costruzione meccanica puoi farla in molti modi. Non devi prendere come esempio questa immagine.
Hello Livio
Thank you very much for your reply. It is very helpfull for me.
At this moment I don’t connect the ampliefier to chamber and after your reply I will connect the HV and JFET’s gate in “classical” way.
For your information, I have measured capacity between the cylinder (then GATE) and the outer shield. I have obtained the value of about 110 pF, because the distance between is 5 mm. In future, if I will find time, I probably will test the reverse connection.
With best wishes for you
Andrew
The 110 pF is about 20 times the normal Gate + electrode capacity
(normally we consider it about 4 pF)
Adding 110 pF in the LTSpice simulation, the pulses on TP3 are reduced from the usual 2 volt, to less than 300 mV.
Hello Livio
All is clear.
Many thanks for you.
Andrew.
Hi Livio
My ion chamber work. In mode”radon exposition” in my home place the result is about 30 Bq/m^3. The effect on ventilation is also visible, decrease to 20 Bq/m^3. I haven’t radioactive materials for another testing.
But on test screen very characteristic results are visible: double, triple or quadruple serial signals, i.e. signal, after 2-3 second next signal, third signal after 2-3 second….
I think, this is effect of mechanical resonance, it is true?
I have used another HV module, on UC38C43. Can it generate additional noise? It is possible to locate HV module outside ion chamber and connect via old TV HV kinescope cable?
With best wishes
Andrew Nowicki, Poland
Please translate with Google.
Tempi di 2 o 3 secondi non possono essere causati da risonanze meccaniche. Probabilmente la soglia di scatto è troppo bassa e quindi vengono rilevati anche impulsi deboli dovuti al rumore.
Eliminare il rumore dalla alimentazione è molto difficile, inoltre anche i disturbi in arrivo dall’impianto elettrico passano da ogni minima fessura meccanica o difetto di schermatura e di messa a terra.
L’alta tensione può sicuramente stare fuori, ma basta sbagliare una piccola cosa e i disturbi ti creano grandi problemi. A volte è bastato anche solo avere la ventola troppo vicina alla camera, poi allontanandola di 2 o 3 centimetri i disturbi sono spariti.
Devi quindi fare molte prove fino a capire tutte le interazioni e i disturbi che avvengono.
Complimenti per i vostri progetti, siete veramente illuminanti.
Ho provato a costruire la camera (v7 smd).
Ho controllato le tensioni (sull’elettrodo, su tp2 e tp3) e tutto è corretto.
A camera aperta ho provato la camera è vedevo impulsi con il theremino collegato (ho usato la retina al thoron).
Richiusa la camera ma niente più segnale.
Riaperta e controllati tutti i check point, sostituito l’amplificatore, controllato il fet, niente di niente.
Cosa altro posso provare? Problemi di schermatura e basta?
Grazie mille e ancora complimenti.
Angelo
Mi spiace, non mi ero accorto di questo messaggio.
Comunque non ho consigli utili, segui lo schema, misura le tensioni, fai molte prove…
Forse si è bruciato il FET?
Se mandi una scintilla sull’elettrodo centrale potrebbe facilmente rompersi.
Forse è successo mentre la chiudevi ?
Ma da aperta funziona?
Complimenti per il lavoro..
quali sono le alternitive al BF861A,
che e’ attualmente dichiarato obsoleto e introvabile?
Mi spiace ma non abbiamo provato altri FET
Per trovare un FET adatto bisognerebbe:
1) Cercare equivalenti su Mouser o Farnell
2) Confrontare con attenzione le caratteristiche, soprattutto il guadagno, il voltaggio di soglia del Gate e il LowNoise.
3) Provare a collegarlo come da schema con:
– un resistore da 1k verso il 2.5 volt
– un resistore da 1k verso massa
– gate a massa
In queste condizioni sul Drain e sul Source ci devono essere approssimativamente le tensioni indicate (circa 2.2 V e circa 0.3V)
Se le tensioni sono quelle indicate entro un +/- 10% allora andrà bene.
Dopo aver fatto tutto questo sarebbe anche utile scriverlo qui, grazie.
Dear Livio,
We’re also in the quest for BF861A, but it seems impossible to obtain.
Has anyone found an alternative part since last year?
We would like to build 10 radon chambers.
Kind regard from Madrid.
Qualunque FET a basso rumore e simmetrico dovrebbe andare bene.
Ma deve avere anche caratteristiche simili al BF861A, soprattutto il guadagno, il voltaggio di soglia del Gate e il LowNoise.
Consiglio quindi di comprarne due o tre modelli tra i più promettenti e poi provarli come abbiamo descritto, fino a trovarne uno che dia approssimativamente le tensioni indicate (circa 2.2 V e circa 0.3V).
Thank you very much. Regarding the L1 4.7 mH inductor, please could you tell me the package format or a reference in Mouser or similar?
Kind regards
Mi spiace ma ne sono stati usati molti tipi diversi e non so dirti quali puoi acquistare più facilmente. Se costruisci l’ultima versione V7 (e te lo consiglio) L1 deve essere da 4.7 mH e con meno di 12 ohm in serie. Se fai lo stampato identico al nostro deve essere SMD e delle giuste dimensioni, altrimenti adatterai lo stampato alle bobine che trovi.
Se vuoi potresti scrivere a Lello che costruisce su ordinazione tutti i nostri progetti e farti dire quali bobine usa lui. Lo chiamo io via skype e glie ne parlo. Ciao, Livio.
Lello : maxtheremino su eBay
Mail : ufficiotecnico@spray3D.it
Thank you very much Livio… I’ve written him.
We used this model:
Value 4.7mH
Case SMD 8×8 mm
Distributor code Mouser 710-74404086472
https://www.mouser.it/ProductDetail/Wurth-Elektronik/74404086472?qs=h3%2Fj8evtlm36OCRB6FhGzg%3D%3D
Bye
Livio
Cari tutti,
ma poi la versione ad elettrodo centrale ad alto voltaggio lo avete testato? Potete condividere lo schema? A livello costruttivo è molto più semplice, ci sono particolari svantaggi rispetto all’altra versione?
Grazie
La abbiamo testata ma non si riesce a farla andare. Basta un po’ di umidità e il rumore cresce in modo esagerato. Questo è dovuto al fatto che inevitabilmente esistono punti lontani tra loro meno di 10 mm e con potenziali diversi tra loro di 400 volt. E uno dei due è proprio l’elettrodo centrale che sente anche i microbi.
Abbiamo anche provato a ricoprire di paraffina tutta la zona che va dall’elettrodo centrale attraverso il condensatore di isolamento fino al circuito di misura. Ma non si riesce a ottenere niente di stabile. Va per un po’, magari un giorno o due, e poi inizia a friggere, scaricare e fare ogni genere di rumori.
Anche con la versione standard avvengono di sicuro piccole scariche tra il cilindro esterno e l’involucro esterno che è a massa. Ma non danno disturbi perché si trovano al di fuori della area sensibile e l’elettrodo centrale non le vede.
Buonasera,
innanzitutto complimenti per il progetto, che vorrei costruire, ma purtroppo ho grosse difficoltà nel reperimento dei componenti, ad esempio non riesco a trovare il FET BF861A, quasi tutti i fornitori lo danno per DISCONTINUED oppure FUORI PRODUZIONE.
il transistore MMBTA42 invece l’ho trovato da RS ma in confezione da 50 pcs, di cui non saprei cosa farne. Stessa sorte per lo zener MMSZ5270 ma almeno qui la confezione da 100 pcs verrebbe a costrare solo 1,2 euro. Non va bene invece per il regolatore AP2210, confezione minima 100 pcs al prezzo di 18,3 euro.
Cortesemente, potreste segnalarmi delle alternative ? Ringrazio sentitamente.
Come abbiamo già scritto dovresti rivolgerti a Lello che acquista a lotti e poi distribuisce.
Lo trovi qui:
https://www.theremino.com/contacts/producers#hardware
E vende anche su eBay
ciao
Livio
Cari tutti,
per la schermatura esterna l’acciaio inox (axes 304) immagino che non vada bene, non è ferromagnetico.
Detto questo che materiale si può usare senza che arrugginisca?
Grazie
Si può usare qualunque metallo conduttivo. La schermatura deve essere elettrica, non magnetica. Ma attenzione che la schermatura elettrica deve essere totale, ben fatta e collegata a GND (negativo). Non ci deve essere neanche una fessura (su fori si deve mettere la reticella di rame) e non ci devono essere punte, trucioli o spigoli vivi, tutto ben fatto e tutto arrotondato bene con carta vetro fine. Ogni punta anche quella delle viti che si affaccia all’elettrodo dell’alta tensione è una fonte potenziale di piccole scintille che disturberanno le misure.
L’acciaio inox va bene ma l’alluminio è più facile da lavorare.
grazie mille, nel file “costruzione camera ver 7” è indicato che alluminio non è saldabile e non scherma i campi magnetici. Immagino che la seconda è solo una considerazione che non inficia quindi sulla costruzione della camera.
Si è solo una considerazione. Per arrivare a creare falsi conteggi ci vorrebbero campi magnetici fortissimi che si possono trovare solo vicino a saldatrici e motori di grande potenza o apparecchiature mediche o scientifiche.
In ogni caso la corrente di spunto di grandi apparecchi arriverà a produrre falsi conteggi molto più facilmente per via elettrica che magnetica.
Se non si scherma tutto ultra bene (elettricamente) e non si mettono filtri tra la rete elettrica e il PC (che deve essere rigorosamente a massa), allora basta anche solo accendere e spegnere una lampadina per provocare falsi conteggi. E sono sempre i campi elettrici condotti attraverso i fili che creano questi problemi.
Thank you for designing a nice working circuit.
I repeated it in a two liter box.
https://youtu.be/Un87wkE-vnI?si=j4dUNdOf3o5HJYqG
Gives enough counts to measure outside air radon 100 clicks per hour
Arduino counts pulses and displays on a graph every hour or every 5 min for sniffing
Measured radon gas seeping through the concreete floor
https://youtu.be/1uyaOBdJuaY?feature=shared
We have added a reference to your YouTube pages
https://www.theremino.com/contacts/references#janisalnis
If you don’t like it or if you have any suggestions or corrections, write to us and we will remove or correct it immediately.
Estimado Livio ¿podrías indicarme qué fórmula utiliza Theremino Geiger para convertir cpm en Bq/m3? Gracias
Queridos jfmateos
Utilice el botón derecho del mouse y traduzca en su idioma.
O puedes ir al inicio de esta página y traducir todo el sitio.
————-
I copy the relevant parts in this file:
https://www.theremino.com/files/Bequerels_From_CPS.txt
If you can not understand them, please write another message.
————-
If you use a IonChamber for the Radon please read also this section:
https://www.theremino.com/blog/geigers-and-ionchambers/ionchamber-improvements/comment-page-1#concentration
Thank you very much Livio… so, for Radon, if I want a reading similar to comercial sensors I should just divide (raw) cps by 0.43 to get Bq/m3 without applying the dead time and tube corrections of your code to cps?
Sorry… i meant dividing by 430
If you use our app Theremino Geiger and our 1 liter Radon Ion Chamber, you must set the sensor sensitivity to 0.43 CPS/Bq/l to measure similar to commercial sensors.
Go to the panel Options / Sensor props.
– Set Sensor Type = IonChamber
– Set Sens. CPS/Bq/l = 0.43
– Set Background CPM = 0.00
– Set Dead time uSec = 10000
Or do all this automatically opening the menu Sensor Type and select “IonChamber 1lt”
Nice, thank you very much… we will send our 1 liter Radon Ion Chamber (version 7) to a calibration laboratory and keep you informed.
Thank you for your reports.
The laboratory must set a new value in the field
“Sens. CPS/Bq/l” and I hope they find a value similar to 0.43
But if the value measured is very different, for example 0.8 or 0.2 then there is some measuring error, or the chamber is not working, or there are electrical inducted noises, or too much humidity (more then 70%), or someone has moved or touched the chamber tube during the test…
Frequent cause of errors are humidity or dust in the chamber.
You can check that everything is fine by checking that the pulses are quite regular, about 2 per minute or something like that. Sometime 2 poulses could arrive close to each other, but “bursts” of pulses must never occur. If bursts occur (many pulses all together within an half a second) then either there is dust in the chamber, or there is too much humidity, or there have been strong vibrations.
To be able to help you better, it would also be useful to know if the electronics of your camera corresponds to the latest version we published (with the 1 Giga Ohm resistor on the central electrode) or if it is an old version. I say this because the latest version is more resistant to high humidity values.
Ciao a tutti,
ho un paio di dubbi, se una particella alfa genera 200K elettroni liberi circa, dovrei avere circa 33fA, amplificati a 5000 dal FET dovremmo arrivare ad un impulso su TP2 di 0,165uV, dove sbaglio?
Lo stadio di preamplificazione è un amplificatore di precarica? Anche qui non mi tornano i conti con la teoria, forse sbaglio qualcosa.
Mi date lumi per favore?
Grazie
Perché “amplificati a 5000”, dove lo hai trovato ?
Non so se i 33fA sono giusti ma mettiamo che lo siano.
– La tensione che sviluppano sul Gate è 33fA * 1 Giga ohm = 33 uV
– E anche senza fare calcoli mi sembra abbastanza normale che questi 33 uV di variazione sul Gate producano più o meno la stessa variazione sul Source.
– And 33 uV sul source verranno moltiplicati circa per il rapporto tra R4 e R1 dall’operazionale
– Quindi 33 uV * 10 mega / 1 k diventano 330 mV
– And 330 mV è più o meno la altezza degli impulsi che misuriamo
Grazie,
avevo letto nel doc “Radon_IonChamberV7_Electronics_ITA.pdf ” che il FET amplifica di 5000.
Probabilmente il 500 volte si riferiva a versioni precedenti
In realtà il fet non amplifica in tensione ma solo in corrente ed è poi l’operazionale ad amplificare di 10000 volte
Un’altra domanda sia il passa alto che il passa basso che si manifestano sono centrati sui 15/16 hertz. Corretto?
Con passa alto intendi C2?
In realtà non è proprio un passa alto ma è configurato come un amplificatore di carica.
Comunque si. Agisce anche da passa alto, ma non ricordo a che frequenza è, se vuoi vedere tutti questi valori simula con LTSpice, c’è lo ZIP con le simulazioni pronte.
Ciao a tutti,
qualcuno ha provato una configurazione a piatti paralleli?
Grazie
Non abbiamo mai provato ma l’elettronica potrebbe funzionare anche in configurazione a piatti paralleli.
Se qualcuno vuole provare dovrebbe fare attenzione ai punti seguenti:
– Per utilizzare la stessa elettronica e la stessa tensione, la distanza tra i due piatti dovrebbe essere simile al raggio della nostra camera cilindrica (30 .. 40 mm).
– Il piatto che è collegato alla alta tensione dovrebbe essere costruito con cura, con spigoli arrotondati per evitare la generazione di scintille e ben isolato dalla struttura schermante esterna.
– La documentazione che si trova in rete sulle camere a piatti paralleli può essere fuorviante perché parte sempre dal presupposto che si usi la camera per misurare una corrente mentre noi la usiamo per contare le disintegrazioni.
– Il piatto che diventa l’elettrodo di misura deve essere mantenuto abbastanza lontano dallo schermo esterno in modo da non aumentare troppo la sua capacità in pico farad.
Nella camera cilindrica l’elettrodo di misura era un filo lontano da tutto, mentre con la configurazione a piatti paralleli diventa un rettangolo con un’area abbastanza grande. Non so quanto può incidere l’aumento di capacità ma oltre a un certo punto la altezza degli impulsi si abbasserebbe al punto da rendere difficile distinguerli dal rumore e rivelarli. Per sapere quanto questo fattore potrebbe incidere bisognerebbe fare dei calcoli e poi delle simulazioni con Spice, oppure si potrebbe provare a costruirne una, misurare gli impulsi con l’oscilloscopio e confrontarli con quelli pubblicati nella nostra documentazione.
Stavo pensando di farlo con due pcb sovrapposti. Un pcb con un lato a massa e l’altro con i 400 volt e l’altro pcb con un lato come elettrodo collegato al fet e un lato a massa. A conti fatti la capacità elettrodo fet con elettrodo alto voltaggio è di 0,8 poco farad. Teoricamente non mi sembra così elevata la capacità.
I due pcb sarebbero uniti da un cilindro di plastica rivestito con foglio di aluminio.
Il tutto deve assolutamente essere schermato in tutte le direzioni verso l’esterno.
In altre parole racchiuso in una scatola metallica (anche alluminio ma metallica e collegata a massa)
La capacità tra l’elettrodo sensibile e la schermatura non sarà così bassa a meno di avere la schermatura piuttosto lontana.
Ma forse non ho capito le dimensioni che intendi, io pensavo ad elettrodi da molti decimetri quadri, più o meno una grossa scatola da scarpe alta circa 6 centimetri, in modo da arrivare non dico a un litro come la nostra ma almeno a mezzo litro.
Se fai il tutto molto più piccolo la capacità naturalmente diminuirebbe ma avresti una scarsa sensibilità.
Un altro punto da considerare se fai dei PCB è che i lati di rame avranno spigoli vivi e angoli che possono favorire la creazione di ionizzazione e microscintille.
Pensavo di fare gli elettrodi circolari in modo da non avere spigoli, circa 6 di diametro. I due pcb sarebbero poi uniti da un cilindro alto 4 cm in modo da avere un 100cm3 di volume.
Gli elettrodi circolari eliminano gli spigoli e questo va bene ma siccome il rame è sottile ed è troncato netto sui bordi crea spigoli a 90 gradi che aumentano il campo in quel punto. Inoltre subito dopo non c’è aria ma vetronite dove col tempo si crea uno strato superficiale inumidito e quindi leggermente conduttivo.
La distanza tra l’elettrodo con l’alta tensione e il cilindro esterno non dovrebbe essere fatta di vetronite del PCB ma di aria altrimenti basta una minima umidità per produrre piccole scariche lungo la superfice della vetronite. E basta niente per produrre falsi impulsi.
Se gli elettrodi sono distanti 4 cm il cilindro dovrebbe essere alto almeno 5 o 6 cm in modo da lasciare almeno 5 o 10 mm di distanza tra l’elettrodo della alte tensione e la schermatura e un centimetro di distanza tra l’elettrodo sensibile e la schermatura.
Il cilindro schermante dovrebbe essere di diametro più largo dei dischi in rame per garantire anche li una certa distanza, soprattutto tra l’elettrodo della alta tensione e il cilindro.
E infine 100 cm3 di volume sono proprio pochi, bisogna già aspettare ore per avere buone misure con un litro e con 100 cm3 dovresti aspettare decine di ore.
Hello and congratulations for this amazing project!
I am thinking of making my own chamber and I’ve already sourced some brand new 0.5l cans of 6.6cm diameter.
Do you think they will work as good as the one liter or do I need to lower the high voltage to maintain the 120V/cm field?
Thanks in advance
They should work…
maybe test also with DZ2 shorted to reduce the voltage.
(DZ2 is the easiest to be shorted)
Naturally with 0.5 liters you will have a reduced sensitivity.
Thanks for the reply.
I would be expecting it to be lower sensitivity and I’m okay with that. I’m going to leave them for weekly measurements anyway. I will try to reduce the voltage so I can get the same field as you suggested. Once I complete them I will let you know if my results